
The last round of my seven game marathon was against Julio
and his Tau. Julio brought;
Commander Farsight
12 Fire Warriors with Pulse Rifles
12 Fire Warriors with Pulse Rifles
12 Fire Warriors with Pulse Rifles
8 Pathfinders (8 Markerlights/Devilfish with Burst Cannon
and Pulse Carbine Drones)
Piranha (Fusion Blaster)
Hammerhead (Railgun and Pulse Carbine Drones)
3 Broadsides (3 Twin-Linked Railguns/3 Twin-Linked Plasma
Rifles/Blacksun Filter)
3 Broadsides (3 Twin-Linked Railguns/3 Twin-Linked Plasma
Rifles/Blacksun Filter)

I realize now that this list is illegal due to Farsight only
allowing one unit of broadsides, but that obviously is after the fact now. He
has a lot of high strength shooting, which of course scares my big bugs. Once I
get across the table I should be able to handle his list, though it will be
interesting to see how overwatch effects my charges. All that plasma may make
me think twice about trying a long charge (note: it is almost always worth
risking the long charge. If I don’t charge I am taking the shots anyways, and
they will be at full ballistic skill rather than just BS1). I brought;
Tervigon (Onslaught/Scything Talons)
Tyranid Prime (Lashwhip/Bonesword/Scything Talons/Toxin
Sacs)
2 Hive Guard
2 Hive Guard
Tervigon (Catalyst)
10 Termagants
2 Carnifex (Twin-Linked Devourers x2)
Trygon (Toxin Sacs)
Trygon
One thing I forgot to do was to swap out dominion on the
tervigons for a different biomancy ability. Julio got the warlord ability that
let him pick if nightfight was in play turn one, which he selected to have
occur. I selected the Prime as my warlord and received move through cover for
units within 12”. I completely forgot to use that. I should make a token to
mark my warlord from now on so that I remember. In this report the unpainted
tervigon is my troop while the painted one is my HQ. The random people in the
background were friends and family of Julio. They all were fun making jokes and
such. One of them was a fellow nid player.
The mission is Big Guns Never Tire and we are using Hammer
and Anvil for the deployment. Not only does this mean there will be more space
between us, but also that Julio can score with his heavy support. We roll for
five objectives and thankfully I win the roll to go first.
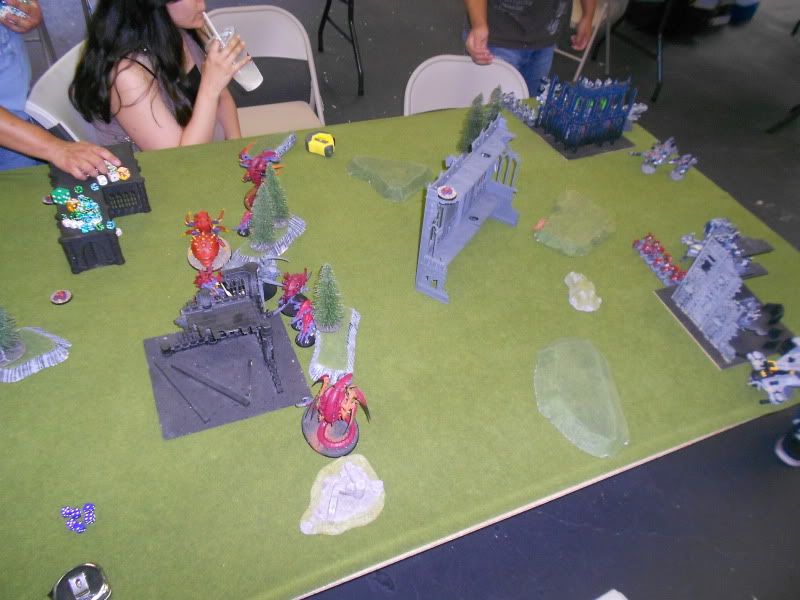
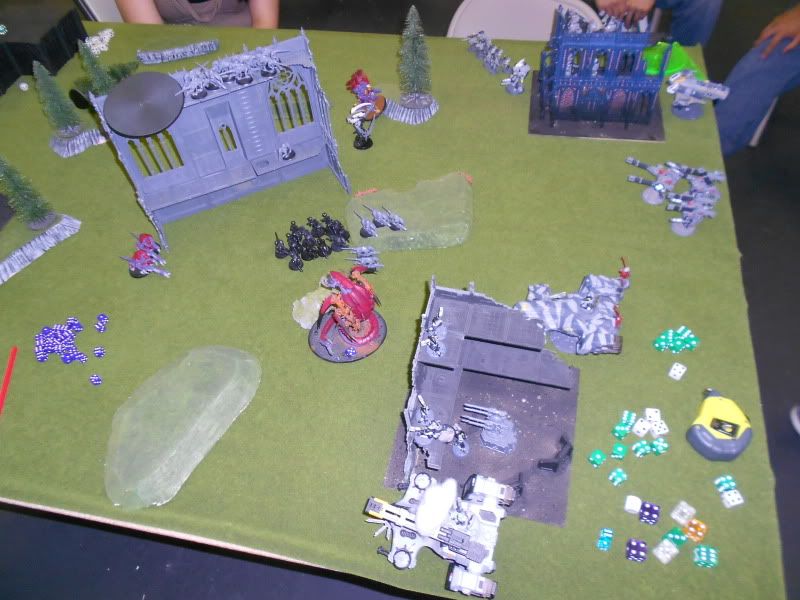
I placed two objectives on the left (my board edge) one foot apart and six inches from the table edge. The terrain in front of them (black building at the top of the table) is line of sight blocking meaning that any gants behind it are safe from shooting. I placed my last objective on the top floor of the center ruin. Assuming Julio would be deploying further back than I was this objective would be difficult for him to reach due to it being several floors up in a ruin. It would also give cover to objective holders within his firing range. Julio place one objective in each building in his deployment zone. Farsight is in the top ruin with a unit of broadsides, the piranha, and two squads of fire warriors. The bottom ruin has the pathfinders in in. The reason he placed many fire warriors out of cover was because the ruins in his deployment zone did not have windows on the first floor; putting them in the open meant he would get more shots. I reserve my gants.
Tyranids 1
My HQ tervigon spawns a 10 gant unit rolling doubles. They
proceed to hide behind cover on the back objective. This tervigon uses
onslaught (allows me to both run and shoot) on the bottom hive guard. Troop
tervigon spawns a large squad without getting doubles. They go into the center
ruins. Catalyst is used on the bottom trygon. Everything shuffles up and gets
cover. I am out of range to do anything offensively.
Tau 1
Julio moves nothing and opens fire. Markerlights target the
bottom trygon upping fire warrior ballistic skill tand taking his cover away.
He does one wound to the bottom trygon after feel no pain. One broadside team
did 3 wounds to the top trygon and the other did three wounds to the HQ
tervigon. 5+ cover really hurts.
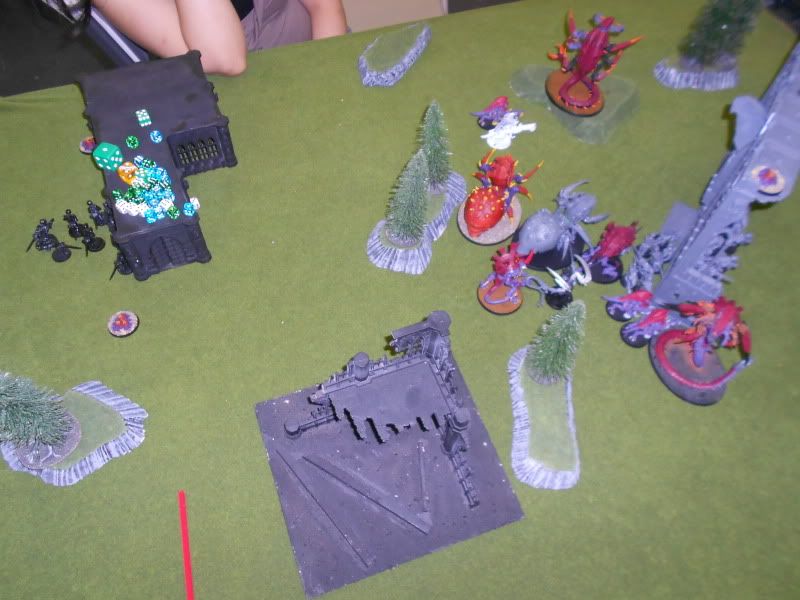
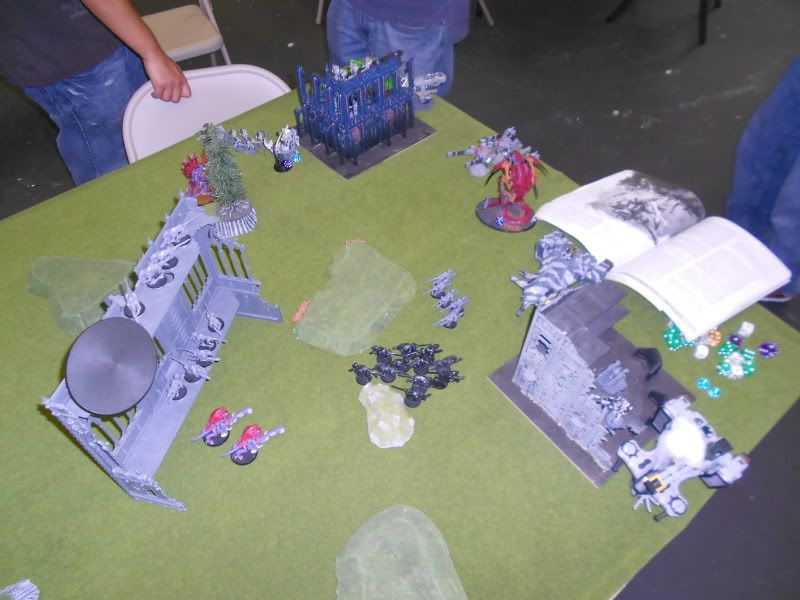
Tyranids 2
My reserves come in my backfield. I now have two gant squads
on the two objectives that are out of line of sight. I move the mid gant squad
to the top floor of the objective. I then spawn a midsize gant squad (black),
without doubles. I then move my troop tervigon to the second floor of the ruins
(represented by its base. This is an
illegal move. The rulebook clearly does not list monstrous creatures as being
able to leave the ground floor. HQ tervigon uses catalyst on the trygon up
top. My goal is to alternate FNP bubbles and switch which units are more out of
cover to give incentives to Julio to shift his target priority. By making
different units appealing to shoot at on different turns I can hopefully keep
my battle line alive, though wounded, long enough to get some charges off and
keep him off the center objective. The low hive guard unit stuns the hammerhead
on a single damage result. Gant shooting kills one fire warrior in the red
squad.
Tau 2
The gants I pulled out of cover were taken as bait,
preventing the fire warriors from shooting at my trygon. On the top side I lose
the Trygon, but thanks to FNP he took most of the fire from that side of the
board. Fire Warriors do one wound to the HQ tervigon.
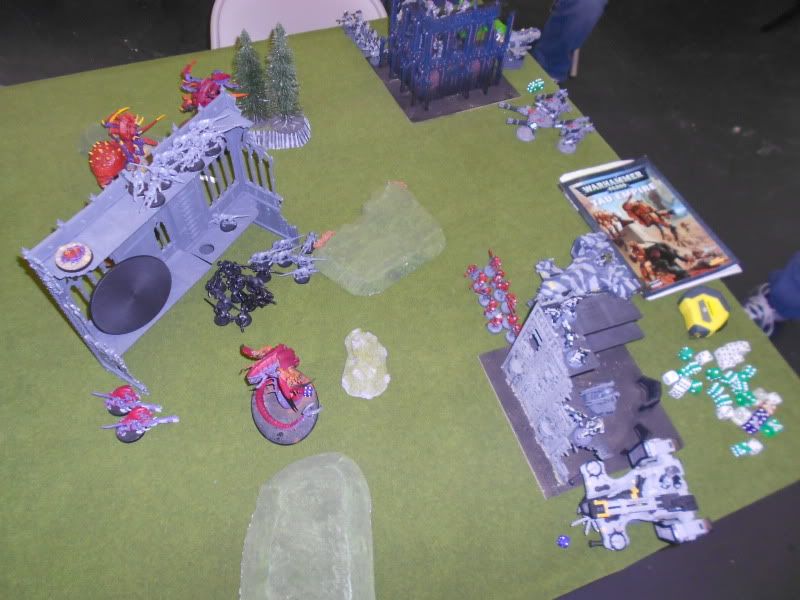
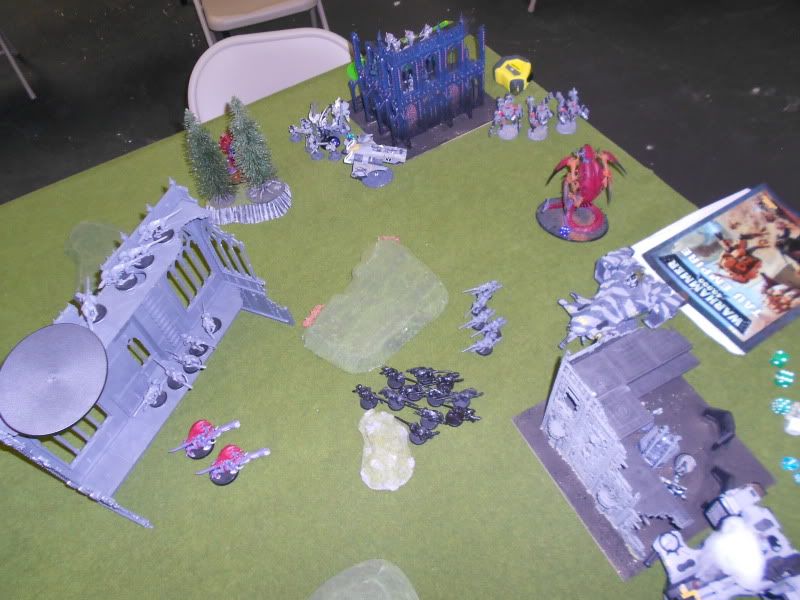
Tyranids 3
The troop tervigon goes to the top of the ruins, FNP’s
itself and spawns seven gants (grey) getting doubles. I push them and the black
gants forward. I need to push the fire warriors back so that they can not get
to the objective in the center. Between the big gant squad in the ruin and the
scoring tervigon with FNP I can reasonably weather the shooting (because most
of it will be used on the Carnifex unit once they make their usefulness known).
I make sure the entire top floor of the ruins is filled so that he can not flat
out his skimmer there to contest. Bottom hive guard get two damage results and
finish off the hammerhead from hull points. Gant shooting kills five fire
warriors who fall back. The bottom trygon misses the charge on the devilfish.
Top tervigon gives onslaught to the carnifex unit. They need three inches on
the run to get to the broadsides…they get a four. I do three wounds. The
tervigon uses its cluster spines and kills one fire warrior. The central
broadsides save the wounds from the upper hive guard.

Tau 3
The fire warriors rally and kill a
few grey gants, but they are in synapse so they hold. Pathfinders shoot the
Trygon but he saves it all. One broadside squad only kills one carnifex due to
cover (plasma was in range) and the other broadsides killed the upper hive
guard unit. I am not using the prime for wound gimmicks due to the plethora of
S10 shots on the table. Julio uses Farsight, who is out of the ruin now, and
the fire warriors to finish off the HQ tervigon.
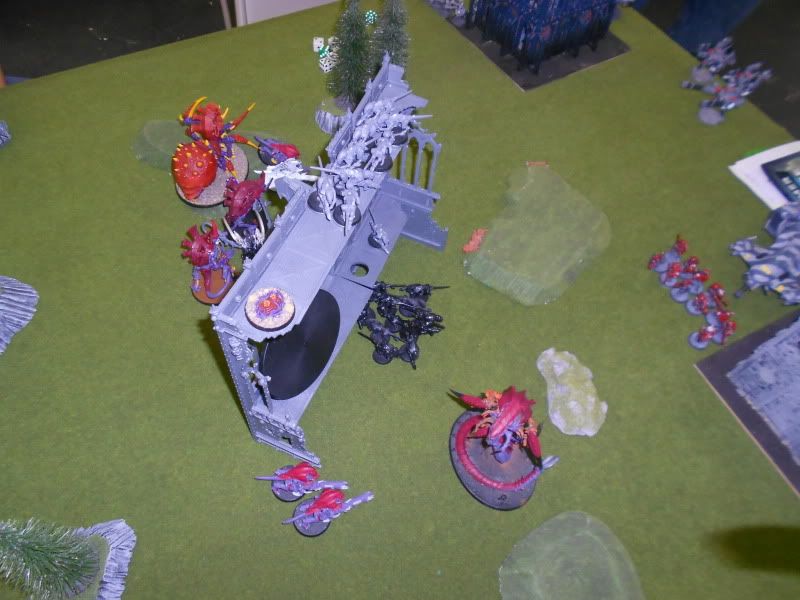
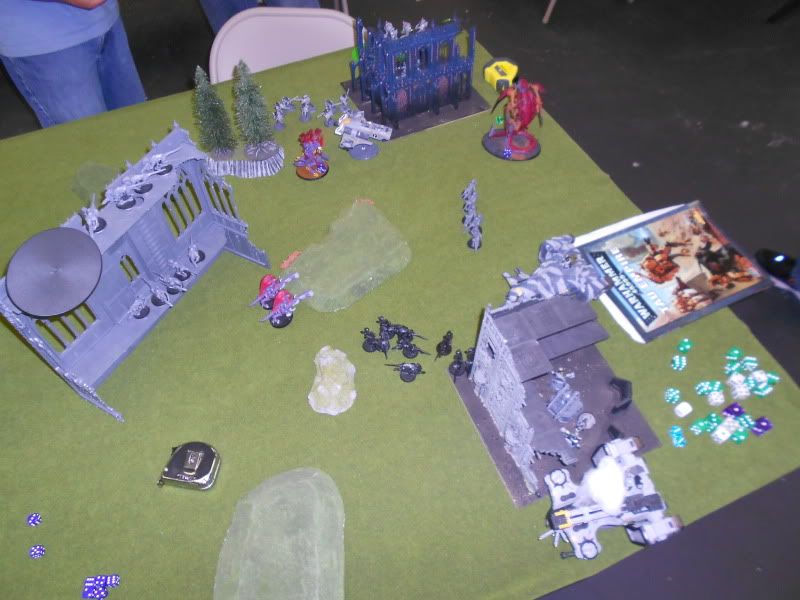
Tyranids 4
I move the two forward gant squads
to where they have line of sight of the pathfinders. I force a morale test from
shooting and they break. The bottom trygon assaults the fire warriors, killing
them all and consolidating into the face of the mid broadsides. Bottom hive
guard get a weapon destroyed on the devilfish. I take of the drones so the
gants will not be pinned. Up top the Carnifex is able to shoot down the last
three wounds from the top broadside unit. The prime separates and charges
Farsight. I do two wounds and he does one. Farsight is not a pushover in close
combat it turns out between his power weapon and invulnerable save.
Tau 4
Julio moves the topmost fire
warriors around the prime and charges them in to protect Farsight. We each do
one wound. Between the fire warriors in the ruin and the piranha blaster he
does two wounds to the carnifex. The mid broadsides move back and fire, but
only do two wounds to the carnifex. Pathfinders regroup.
Tyranids 5
Carnifex moves forward to soften
the Broadsides up before the trygon finishes them. For some reason (could be
because I have only slept three of the last 36 hours…) I forget about my
lashwhip and the Prime and Farsight strike at the same time killing each other.
Black gants move onto the lower right objective which is being contested by
pathfinders. Julio concedes.
I had to play a tight game in this
one. It helped that Julio did not focus fire, but even if he did, say killed
the upper Trygon instead of splitting wounds with the tervigon, there would
always be another monster in its place. I feel his biggest mistake was playing
too defensive. He needed to push forward with his not static elements so that
he could have contested the center. By not focusing fire on my central scoring
units the best he was playing for was a draw. He could have also pushed the
piranha forward. This could have either contested, gotten him a unit in my
deployment zone, or even tank shocked the gants off my two back objectives.
As for my mistake on moving the
tervigon into the ruins, if I would have known I would have stuck him behind
the ruin within 12” of the gants and put FNP on them. Between going to ground,
ruin cover, and FNP they are a big enough squad to hold on the objective. I
also could have marched him onto the lower right objective and chased out the
pathfinders.
End of the day lesson: 6th
is something new and not all is what it appears. Hammer and Anvil against Tau
with Big Guns Never Tire is bad on paper but it can be won. One win on my part
does not make it natural law, it is just an observation on what can be done.
Mistake alert! I was so focused on 6th edition rules I never rolled for instinctive behavior on the two gant squads holding my backfield objectives. That is a big no no. My game plan should have shifted instead to camping my troop Tergigon in the back on one and putting my reserved squad on the other and then sending all spawns forward to the middle. I would have had to be less aggressive with the HQ tervigon to keep synapse on the center gants.
Mistake alert! I was so focused on 6th edition rules I never rolled for instinctive behavior on the two gant squads holding my backfield objectives. That is a big no no. My game plan should have shifted instead to camping my troop Tergigon in the back on one and putting my reserved squad on the other and then sending all spawns forward to the middle. I would have had to be less aggressive with the HQ tervigon to keep synapse on the center gants.
Nice game and nice and clear batrep. Why don't you use new awesome psy-powers? Besides, you cannot switch only Dominion. You shoul choose to keep your codex powers or change all of them for rulebook powers.
ReplyDeleteYou are correct on the dominion swap issue. I played this game the day the book came out, so I did not yet have that information.
DeleteI keep the book powers because I like the consistency. If I do not know my powers then I can not factor any psychic powers into my game plan. I need Onslaught for my Dakkafexes. Not only does this allow them to shoot turn one, but it helps them stay in range all game. On top of that it is nice to know I will have catalyst every game for FNP rather than hoping to get the FNP biomancy power. The last reason is that I do not run my Tervigons super far forward, but rather keep them back. This means than many of the powers would have no benefit for the Tervigons who are nowhere near combat. This is the same reason I do not give them AG or TS.
I know this is an old blog post, but you said one of your carnies died and then later you give your carni 4 wounds and he moves on? Wouldn't he be dead? Maybe I'm getting the pictures wrong.
ReplyDeleteAlso I agree on the psychic powers. The new powers are much of a gamble.
Though they are VERY powerful and the buffs have a 24" range which is pretty good.
Remember that S4 bolters can't hurt a tervigon with T8 from Iron Arm :)